Fast leak detection can mean the difference between a $2,000 repair and a $200,000 problem. For facility managers and property owners, understanding how to identify and address commercial roof leaks quickly has never been more critical.
Undetected leaks can damage structural components, damage inventory, and damage critical equipment or personal property. What starts as hidden moisture beneath a membrane can escalate to mold growth, tenant complaints, and business interruption claims faster than most building operators realize.
If you suspect a leak, here are the fastest ways to confirm it:
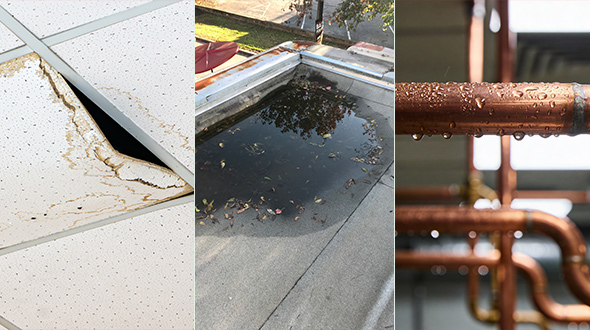
- Visual check inside: Look for brown stains, sagging ceiling tiles, or bubbling paint directly below the suspected area
- Ceiling grid inspection: Follow the pattern of affected tiles to trace the general leak zone
- Infrared scan: A thermal camera can detect temperature differences that indicate trapped moisture
- Controlled water test: Apply low-pressure water to isolated roof sections while monitoring the interior
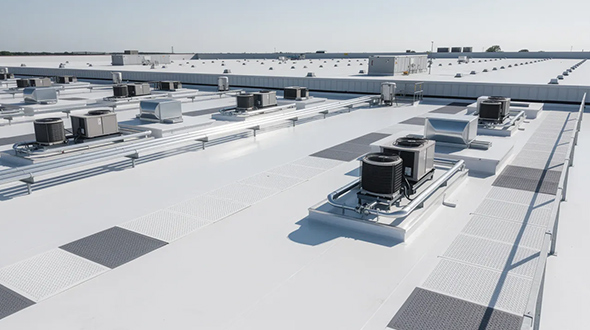
This guide focuses on flat and low slope roofs—the TPO, EPDM, PVC, modified bitumen, and metal roof systems common on commercial buildings. These roofing materials represent the majority of what you’ll find on warehouses, office buildings, retail centers, and industrial facilities across Atlanta and North America.
Whether you’re managing a single building or an entire portfolio, the information ahead will help you protect your assets and make smarter decisions about your roofing system.
Understanding Commercial Roof Leaks
Commercial roof leaks are becoming more frequent for several converging reasons. Roofs installed during the building boom of the early 2000s are now reaching or exceeding their typical 20–25-year service life. Add increasingly severe weather patterns and the growing density of rooftop equipment—from HVAC units to solar arrays to 5G antennas—and you have a recipe for accelerated membrane failure.
Many flat commercial roofs installed between 2000 and 2010 are entering their most vulnerable phase. Aging materials that once performed well are now showing cracks, shrinkage, and seam separation. Even a small leak at this stage can cascade quickly if left unaddressed.
Here’s how roof leaks impact your business operations:
- Tenant complaints and lease issues: Water intrusion through ceilings triggers immediate calls and can affect lease renewals
- Operational downtime: Manufacturing lines, data centers, and retail operations may need to pause during active leaks
- Product and inventory loss: Water damage to stored goods can result in insurance claims and supply chain disruptions
- IT and electrical damage: Dripping water near electrical panels, servers, or control systems creates safety hazards and extremely costly repairs
Most leaks begin as minor, concealed moisture intrusions long before water becomes visible inside the building. By the time you see dripping water or ceiling stains, water has often been traveling through insulation and along the deck for weeks or months. The water leak “location” in the ceiling rarely matches the true entry point on the roof.
Water follows gravity, but it also follows paths of least resistance—along slopes, through insulation joints, and across structural members. A wet spot in the northeast corner of a warehouse might originate from a breach 50 feet away near an HVAC curb on the roof surface.
Early Warning Signs of a Commercial Roof Leak
Catching these warning signs during monthly walk-throughs can save tens of thousands in repair costs. The key is knowing what to look for—both inside the building’s interior and up on the roof itself.
Interior Warning Signs
- Brown or yellow ceiling stains that grow over time
- Sagging or warped ceiling tiles
- Peeling, bubbling, or blistering paint on walls near the roofline
- Musty or moldy odors near exterior walls
- Visible rust spots on the exposed metal deck
- Water pooling on floors after heavy rain with no obvious source
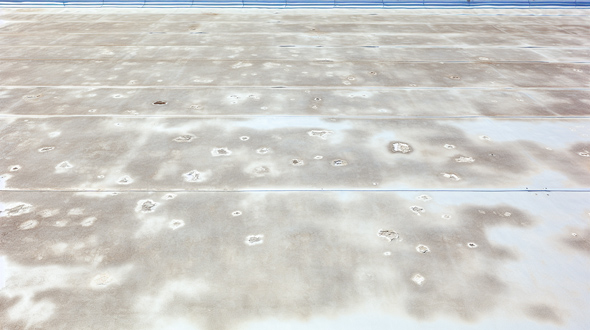
Roof Surface Warning Signs
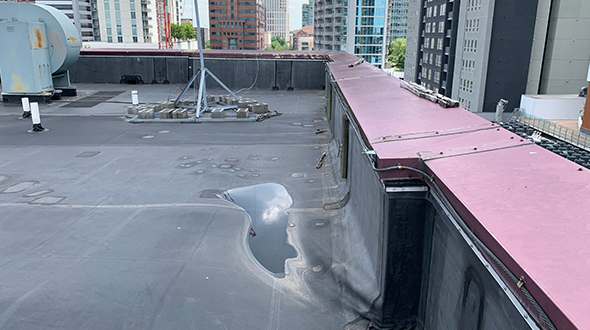
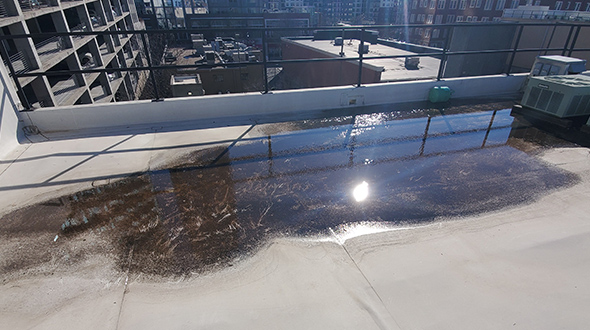
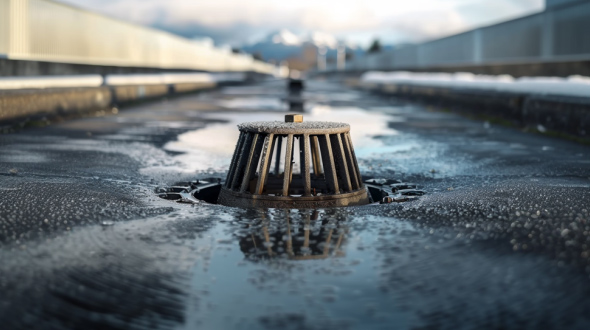
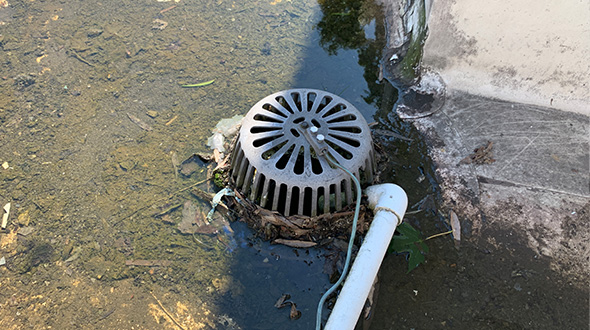
- Ponding water lasting more than 48 hours after rain
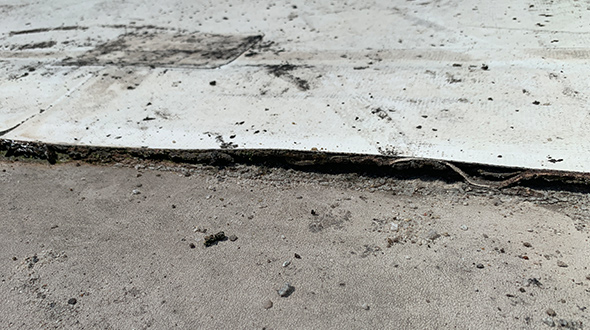
- Open or separated seams between membrane sheets
- Loose, lifted, or missing flashing at edges and penetrations
- Cracked or deteriorated sealant around HVAC curbs and pipes
- Punctures or cuts near foot traffic paths and service routes
- Blistering, bubbling, or alligatoring on membrane surfaces
Mechanical and Energy Clues
- Unexplained HVAC inefficiency in specific building zones
- Rising humidity levels that don’t respond to standard controls
- Rising energy costs in zones near exterior walls
- Condensation forming on interior pipes or ductwork
Keep a dated photo log of any suspicious areas you encounter. Photographing the same spots over several months makes it easy to track changes and share documentation with commercial roofing contractors when a professional evaluation is needed.
Most Common Causes of Commercial Roof Leaks
Understanding why commercial roofs fail helps you prioritize inspections and maintenance. Here are the concrete causes most relevant to modern commercial buildings:
Aging Membranes
Roofs installed 15–25 years ago are entering their failure phase. EPDM and modified bitumen systems, in particular, experience UV degradation and thermal cycling damage over time. This leads to cracking, shrinkage, and loss of flexibility, allowing water intrusion at previously watertight seams.
Improper Installation
Installation defects from older projects continue to cause problems. Unsealed laps, poorly torched seams on modified bitumen, and inadequate terminations at parapet walls are common culprits. These issues may not manifest as serious leaks until years later, when the membrane loses its ability to compensate.
Rooftop Activity Damage
Foot traffic to HVAC units, dropped tools during maintenance, and unprotected service pathways cause small punctures that grow over time. Every time a technician walks across your roof without designated walk pads, the membrane is at risk.
Drainage Failures
Poor drainage accelerates membrane breakdown. Clogged internal drains and scuppers, undersized or neglected gutters, and persistent ponding all contribute. Standing water not only adds weight stress—it actively degrades roofing membranes and creates conditions for biological growth.
Climate and Regional Stressors
Different regions face different threats:
| Region | Primary Stressor |
|---|---|
| Denver/Mountain West | Freeze-thaw cycles that crack membranes and sealants |
| Florida/Gulf Coast | Hurricane-force winds that cause uplift and seam separation |
| Central U.S. | Hail damage to membrane surfaces |
| Northeast | Ice dams and snow load at parapets |
Detailing Weak Points
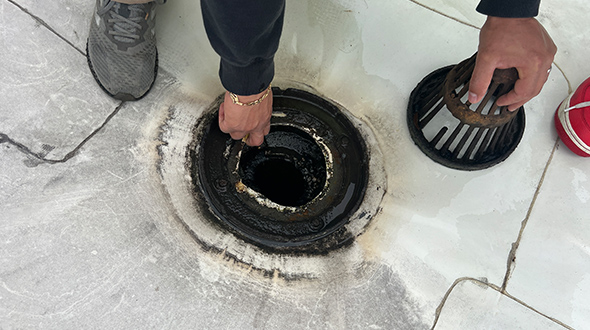
Roof penetrations are the most common source of leaks. Skylights, roof hatches, pipe boots, satellite and 5G equipment mounts, and old pitch pans that have dried out and cracked all represent vulnerable points where water can bypass the membrane.
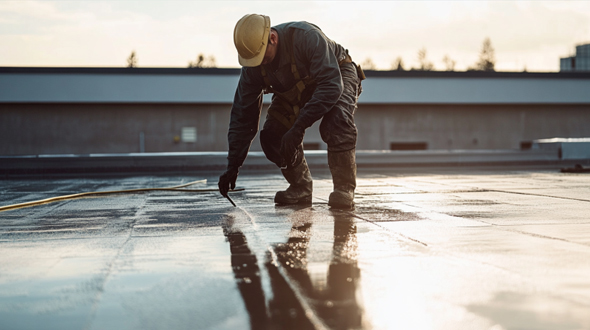
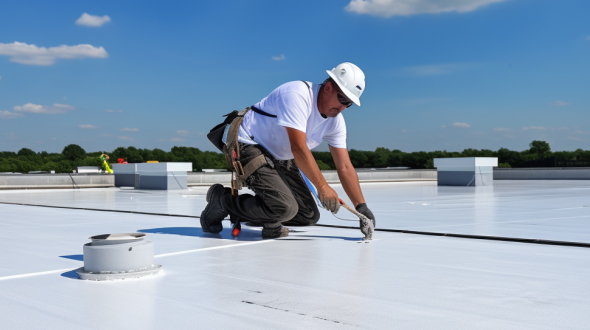
How to Perform a Basic Commercial Roof Leak Check
Before you begin any roof inspection, remember the fundamentals of safety. Use fall protection, obey OSHA rules, and never inspect a roof alone or during storms, lightning, or high winds. Soft spots in the deck may indicate structural damage—proceed with caution.
Here’s a systematic approach any facility manager can follow:
Step 1: Start Inside
- Locate all visible water stains, damp spots, or damaged ceiling tiles
- Note the pattern—are stains clustered or spread across multiple zones?
- Mark suspected leak zones on a printed or digital floor plan with dates
- Check for hidden damage in utility closets, above drop ceilings, and near exterior walls
Step 2: Move to the Roof
- Start directly above the interior evidence you documented
- Systematically sweep the roof in lanes, working outward from the initial area
- Look for punctures, blisters, open seams, and membrane defects
- Note any areas where debris has accumulated or drains appear clogged
Step 3: Check Critical Details
Focus extra attention on these high-risk areas:
- HVAC curbs and equipment pads
- Vent pipes and exhaust fans
- Perimeter edges and parapet caps
- Skylights and roof hatches
- Previously repaired patches
- Expansion joints
- Areas where different roof systems meet
Step 4: Document Everything
Photograph all anomalies with both close-up detail shots and wider context shots. Note the wind direction during recent storms and the date of the last major weather event. This documentation becomes valuable when discussing findings with roofing professionals.
This basic check is for preliminary diagnosis only. Confirmed or recurring leaks require professional testing to pinpoint breach locations accurately.

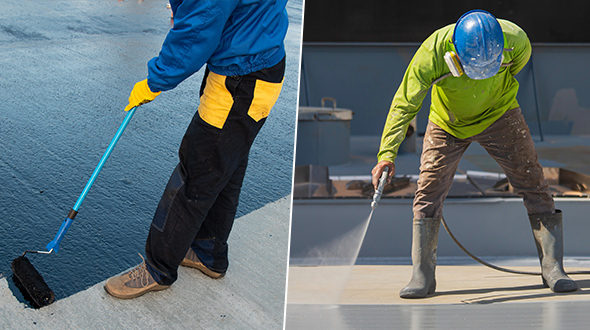
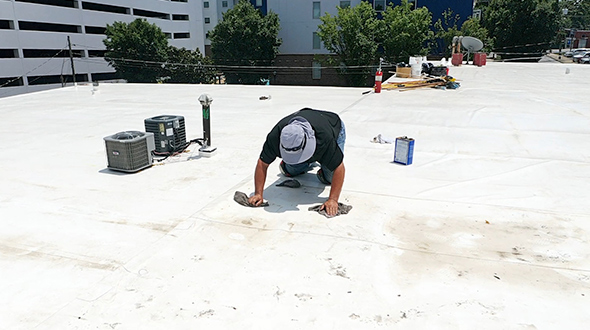
Water Testing: Tracing Difficult Commercial Roof Leaks
Controlled water testing remains a useful traditional method for pinpointing leaks on flat roofs, especially when visual inspection hasn’t revealed the source. The key is systematic isolation.
How to Conduct Water Testing
Start by dividing the roof into small, manageable sections. Begin with areas closest to where interior leak evidence was found, then work outward.
- Prepare the test area: Ensure drains in the test zone are functional, but consider isolating them temporarily if needed.
- Set up communication: Position an observer inside the building with a phone or radio to maintain constant contact with the roof team.
- Apply water: Use a low-pressure hose to wet one section at a time for 10–20 minutes.
- Monitor carefully: The interior observer should watch for any drip or moisture appearance and note the exact time it starts.
- Correlate timing: Match water application times with drip start times to narrow down the leak zone.
- Move systematically: If no leak is detected, dry the area and proceed to the next section.
Critical Warnings
- Never flood roof areas beyond what the structure can safely support
- Do not block drains during testing
- Avoid water testing during freezing conditions, heavy rain, or high wind
- Be aware that some leaks only manifest under specific conditions (e.g., wind-driven rain)
Water testing works best on accessible, low-slope roofs where you can control variables. When leaks remain elusive after water testing, combine this method with advanced technologies such as infrared thermography or electronic leak detection.
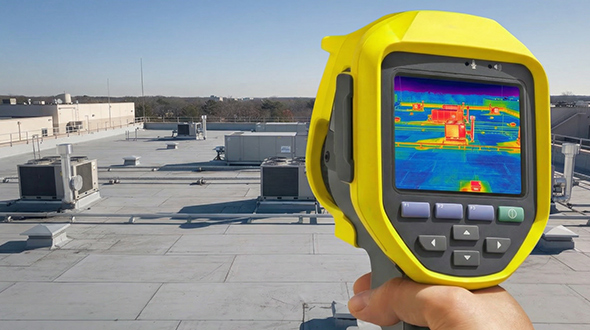
Advanced Commercial Roof Leak Detection Technologies
Modern leak-detection tools help identify hidden moisture without tearing up large roof sections. These technologies can detect leaks quickly and pinpoint problems that would otherwise require extensive exploratory cuts or trial-and-error patching.
Infrared Thermography
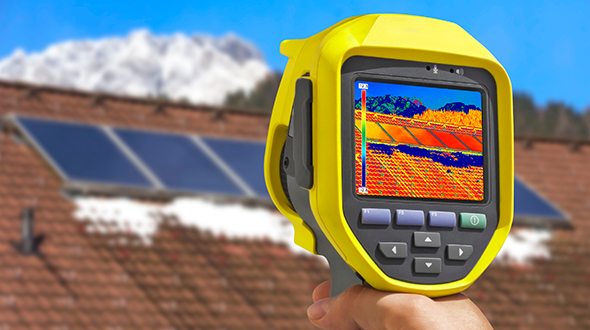
Thermal imaging cameras detect temperature differences in the roof assembly. Wet insulation retains heat differently than dry insulation—after a sunny day, moisture-laden areas cool more slowly and appear as distinct thermal signatures during evening or early-morning scans.
Best practices for infrared roof surveys:
- Schedule scans for late evening after a sunny day
- Ensure the roof surface is dry (no recent rain)
- Works best on roofs without heavy ballast or overburden
- Identifies moisture-affected zones, not specific breach points
Electronic Leak Detection (ELD)
Electronic leak detection uses electrical current to locate breaches in waterproofing membranes. Low-voltage systems (like EFVM or IntegriScan) require a thin water film on the membrane surface and a conductive substrate below. When current flows through a breach point, specialized equipment traces the convergence to pinpoint the exact location.
High-voltage systems work on dry membranes and can cover large areas quickly. Both methods meet ASTM D7877 and D8231 standards for roof leak detection.
ELD can detect membrane punctures as small as a few millimeters, including defects that visual inspections and thermal imaging may fail to identify.
Moisture Meters and Moisture Mapping
Handheld moisture meters and capacitance scanners measure moisture content in roofing layers from the surface. These non-destructive tools help locate wet insulation and deck sections, creating a moisture map that guides repair decisions.
Drone-Based Surveys
For large warehouses, campuses, and distribution centers—especially those exceeding 100,000 square feet—drones equipped with high-resolution or thermal cameras offer efficient coverage. They’re particularly valuable for:
- Buildings with limited roof access
- Initial assessments of large portfolios
- Post-storm damage surveys
- Documenting conditions for insurance purposes
All these methods require trained technicians to operate equipment and interpret results accurately. They’re typically offered by commercial roofing firms, specialty leak-detection companies, and building-envelope consultants.

Roof Core Sampling and Invasive Testing
Core sampling is used when moisture mapping shows persistent wet zones or when you’re planning major repairs or full replacement. It provides ground-truth data that non-destructive methods cannot.
What Is a Roof Core?
A roof core is a small cylindrical sample—typically 2 to 4 inches in diameter—taken through the membrane, insulation, and cover board down to the deck. Each core is labeled with date, location, and orientation for laboratory or field analysis.
What Cores Reveal
- Thickness and condition of each roof layer
- Presence and depth of trapped moisture
- Insulation type and integrity
- Deck condition (steel, concrete, or wood)
- Evidence of previous repairs or modifications
- Contamination or biological growth between layers
Proper Core Procedures
Core cuts must be patched the same day with compatible materials to preserve watertightness and maintain warranty coverage. A poorly patched core can become a new leak source.
When to Use Invasive Testing
Consider core sampling in these situations:
- Recurring leaks that don’t respond to surface repairs
- Suspected widespread saturation across large roof sections
- Before making overlay vs. full replacement decisions
- As part of due diligence for property acquisition
- To support insurance claims or litigation
Licensed commercial roofing contractors typically perform cores in accordance with manufacturer guidelines. The affected area is usually minimal, and a skilled contractor can complete the repair process with minimal disruption.
When to Call a Commercial Roofing Professional
Knowing when to stop investigating yourself and bring in professionals protects both your building and your liability. Here are clear triggers that indicate it’s time for expert involvement:
- Repeated leaks in the same area after multiple repair attempts
- Multiple wet ceiling tiles or stains appearing simultaneously
- Safety concerns, including soft spots in the deck or suspected structural damage
- Roof age exceeding 20 years with no recent professional assessment
- Active water intrusion during rain events
- Major storm damage requiring insurance documentation
- Unexplained mold growth or persistent musty odors
Professional commercial roofing contractors bring diagnostic tools, manufacturer training, and familiarity with local codes and warranty requirements that building staff typically lack. They can also provide accurate diagnostics that prevent unnecessary spending on partial fixes.
Evaluating Contractors
When selecting a contractor for commercial roof repairs or leak investigation, consider:
| Criteria | What to Look For |
|---|---|
| Experience | Minimum 10 years on commercial projects similar to yours |
| Certifications | Manufacturer credentials (GAF, Carlisle, Firestone, Tremco) |
| Safety Record | EMR rating, OSHA compliance history |
| References | Contact info for comparable facilities they’ve serviced |
| Insurance | Adequate liability and workers’ compensation coverage |
What to Request
Ask for a written leak investigation report that includes:
- Photographs of identified defects
- Roof plan or sketch showing problem locations
- Repair recommendations with priorities
- Estimated remaining service life of the roof
- Cost estimates for recommended work
Avoid purely temporary fixes unless they’re used as emergency stabilization before planned permanent repairs. Band-aid solutions often fail and can void warranty coverage.
Preventing Future Commercial Roof Leaks
Prevention programs typically cost far less per year than a single major leak incident affecting inventory, equipment, or tenants. Investing in regular maintenance and a professional roof inspection when needed, are of the most cost-effective decisions property managers can make.
Scheduled Inspections
Commit to professional roof inspections at least twice a year—typically spring and fall—plus after any major weather events like hailstorms, hurricanes, or heavy snow accumulation.
Essential Maintenance Tasks
Regular roof maintenance should include:
- Cleaning drains, gutters, and scuppers to ensure proper drainage systems function
- Removing debris, leaves, and accumulated dirt
- Resealing flashing at penetrations and edges
- Checking seams for separation or lifting
- Reattaching loose edge metal and parapet caps
- Inspecting and maintaining roof hatches and access points
- Clearing vegetation growth near membrane edges
Roof Asset Management
Modern property owners benefit from digital roof asset management plans that track:
- Individual roof sections and their installation dates
- Membrane type and manufacturer
- Warranty status and expiration dates
- Complete repair history with photos
- Scheduled maintenance dates
- Condition scores from each inspection
Cloud-based software makes this information accessible to facility managers, property managers, and roofing vendors alike.
Controlling Roof Access
Uncontrolled roof traffic causes costly repairs. Implement these controls:
- Designate walk pads along service routes
- Mark clear paths to HVAC units and other equipment
- Require all vendors to sign roof access logs
- Train maintenance staff on proper roof behavior
- Require immediate reporting of any accidental damage
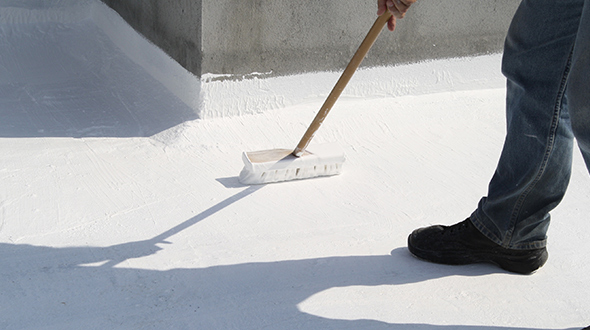
Proactive Upgrades
Consider preventive measures like:
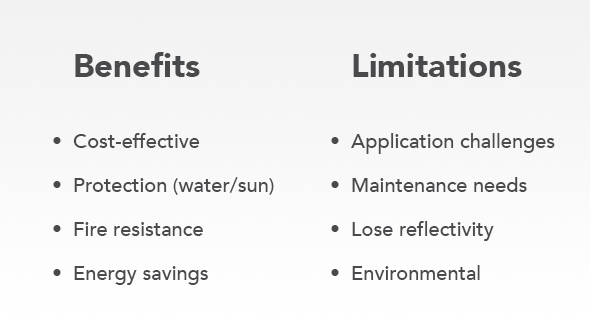
- Reflective coatings on aging but still sound membranes
- Additional drains in chronic water pooling areas
- Upgraded flashing systems at high-risk penetrations
- Walk pad installation along frequently traveled routes
- Embedded leak detection sensors for critical facilities
These investments extend roof life and reduce the likelihood of unexpected failures that disrupt operations.
FAQ: Practical Questions About Commercial Roof Leak Detection
How quickly should a commercial roof leak be investigated?
Investigate within 24–48 hours of discovery. If water is actively entering the building, take immediate emergency measures—contain the water, protect equipment and inventory, and document everything for insurance purposes. Even a small leak can cause significant hidden damage if ignored for weeks.
Can building staff perform basic roof inspections safely?
Yes, with proper training and fall protection equipment. Staff can conduct visual inspections, document conditions, and identify obvious defects. However, the line is clear: observation is appropriate for building staff, but roof repair work and invasive testing should be left to licensed commercial roofing contractors.
What’s the typical cost range for leak detection services vs. replacement?
Professional leak detection services typically range from $500 to $3,000, depending on roof size and methods used. Compare this to a full commercial roof replacement, which can easily cost hundreds of thousands or millions. Accurate early leak detection almost always reduces long-term expense.
Does insurance cover leak-related damage?
Most commercial property policies cover sudden and accidental water damage, but not damage resulting from deferred maintenance or gradual deterioration. Documentation is critical—keep dated photos, inspection reports, and repair records. Report damage promptly and work with your adjuster to demonstrate timely maintenance and response.
How long can a properly maintained commercial roof last?
With regular inspections, timely repairs, and proper maintenance, most commercial roofing systems can achieve or exceed their design life:
| Roof Type | Typical Lifespan | With Excellent Maintenance |
|---|---|---|
| TPO | 15–20 years | 20–25 years |
| EPDM | 20–25 years | 25–30 years |
| PVC | 20–25 years | 25–30 years |
| Modified Bitumen | 15–20 years | 20–25 years |
| Metal | 30–40 years | 40–50+ years |
Modern detection technology helps maintain these systems in a leak-free condition throughout their service life.
Turning Leak Detection into a Long-Term Roof Strategy
Early leak detection protects your building’s structure, your occupants, and your budget. The difference between a $2,000 repair and a catastrophic failure often comes down to one factor: how quickly you find the problem. By understanding warning signs, performing regular inspections, and using modern detection methods, you transform reactive emergency spending into controlled, planned maintenance.
The progression is clear. Start with basic visual checks during monthly walk-throughs. Add infrared thermography and electronic leak detection when basic methods aren’t enough. Move from emergency patching to preventive measures that extend roof life and prevent future problems. Each step in this progression reduces your long-term costs and protects your commercial properties from unexpected failures.
Create or update a 12–24 month roof maintenance and inspection calendar today. Assign clear responsibilities for regular roof inspections and establish documentation standards that will support warranty claims and insurance coverage. Work with qualified commercial roofing contractors who understand your roof type and can provide the accurate diagnostics you need.
Don’t wait for the next major storm to expose vulnerabilities in your roofing system. Schedule a professional leak detection assessment now, before seasonal weather tests your roof’s limits. Your building, your tenants, and your budget will thank you.
(404) 220-9288